As I get a few requests to setup GSM gateways for backup purposes and for mobile to mobile calling.. I always find that I have to sift through doco and click on boxes and to navigate the GSM configuration portal. I thought I would share a quick run down of a basic set of configuration for outbound and inbound calling.
Scenario to configure..
1. Use 2N GSM Gateway for backup purposes only.
2. Outbound calls to use all 4 SIMs and have called ID enabled.
3. Inbound Calls to be directed to the Reception, and also have all 4 SIMs available to use.
So we’ll start from the very beginning.. Crack open the GSM gateway and plug it into your LAN.. I normally direct connect it to my laptop initially. The default IP Address is 192.168.1.2/24.
Log into the gateway with the username: Admin and password is 2n.
There isnt too much to configure here.. Its just knowing where to go to get the gateway up and running.
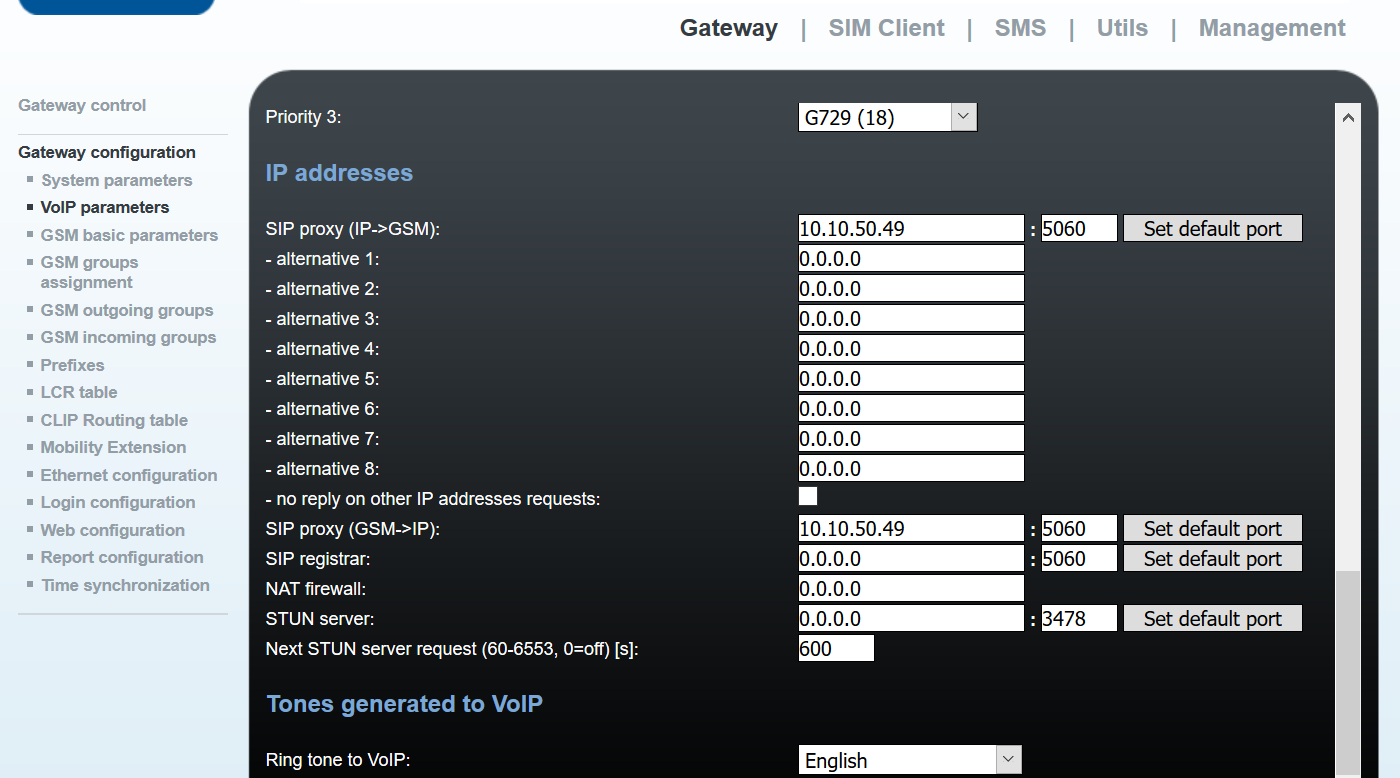
Lets head to the Gateway Configuration Menu (Left), then select Voip Parameters. Here we will want to enter the IP Address of your CUCM Servers. I have entered for both fields IP->GSM and GSM->IP as I have the requirement to setup both outbound and inbound calling.
I also selected English for the VOIP Ring Tone.
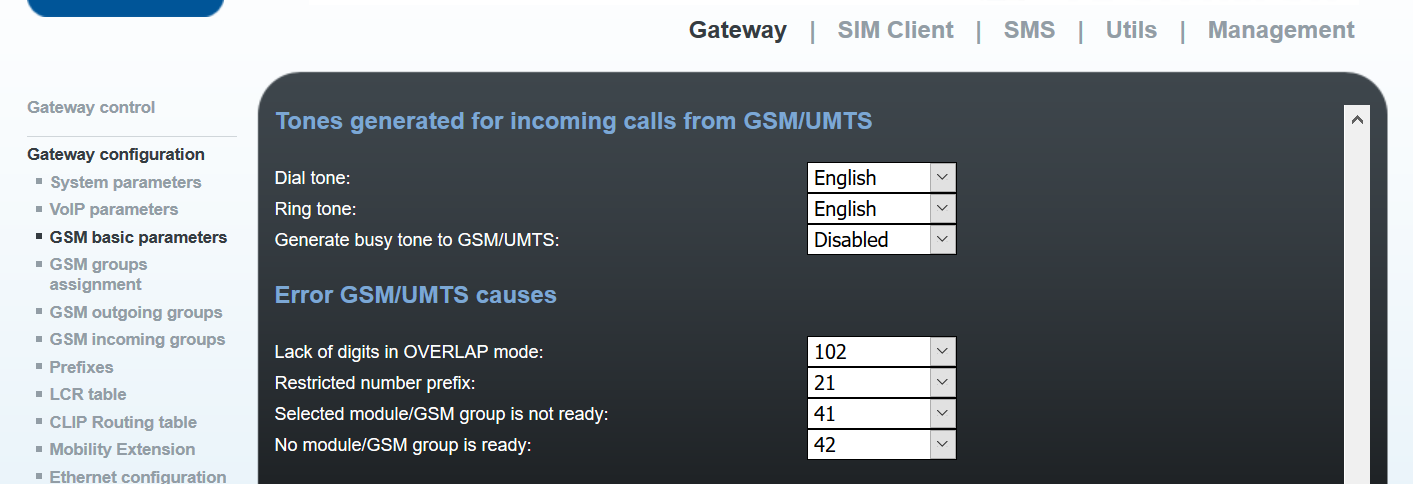
Next is to ensure the Ring Tones are set correctly.. Default is set to European.. So that sound a lot different us Aussies. I set this to English for both Dial tone and Ring tone.
Onto the GSM Groups Assignment. By default all SIMs are placed into Group 1. I will leave this for my scenario.. However, you can dedicate SIMs for either outbound or inbound calling.
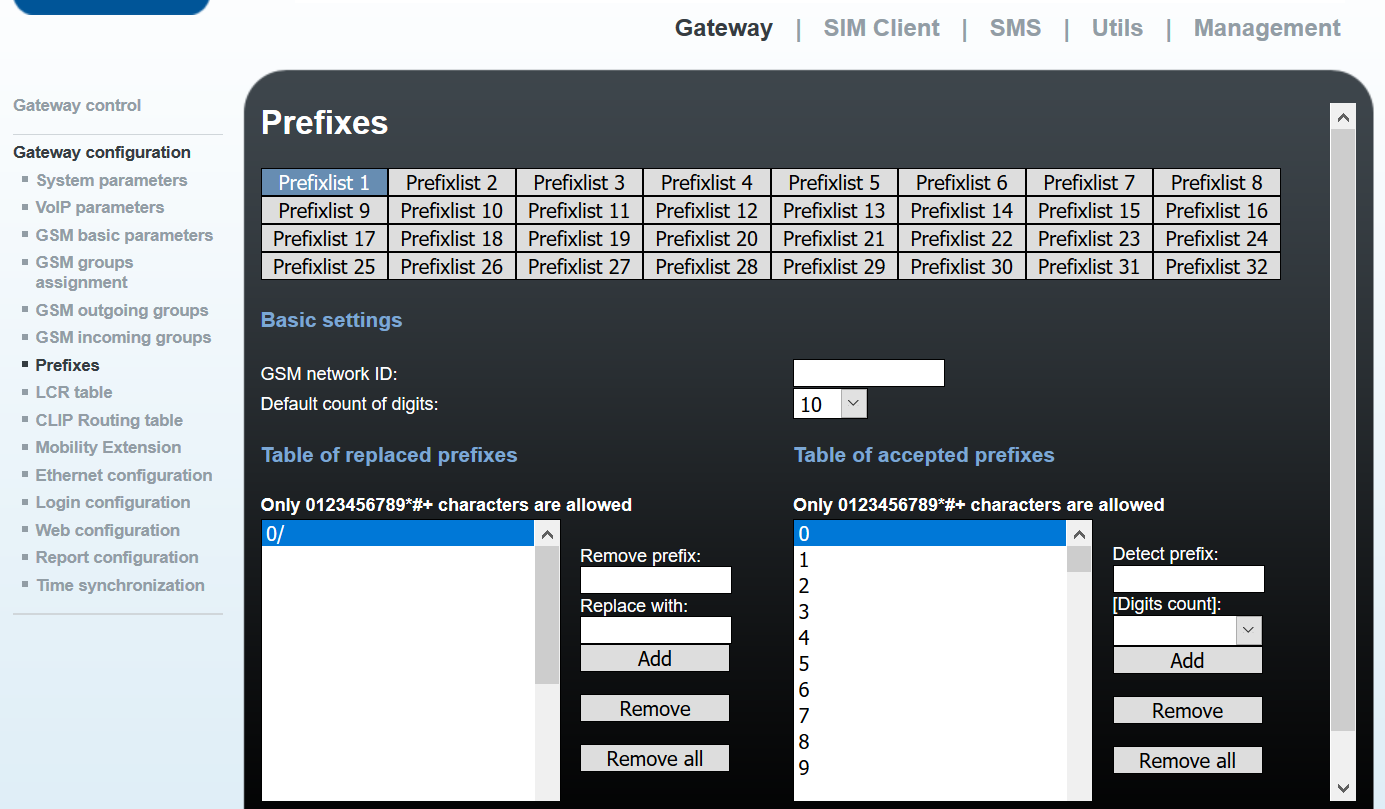
Lets jump down to Prefixes. Simply put, Prefixes allow for normalisation of called numbers. This is exactly what I need to do, as the GSM Gateway will receive Called Numbers from CUCM with a Zero (0) prefixed.. We need to remove the Zero before we dial out to the Telco network. The below image depicts just that. I’m removing the Zero and replacing with ‘nothing’ essentially.
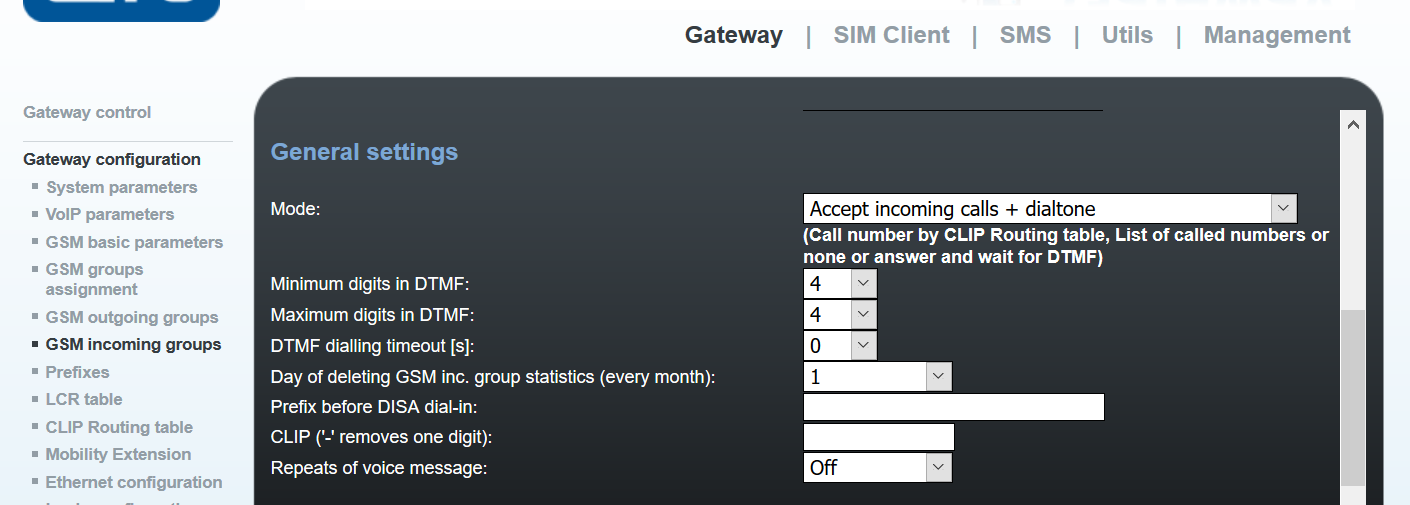
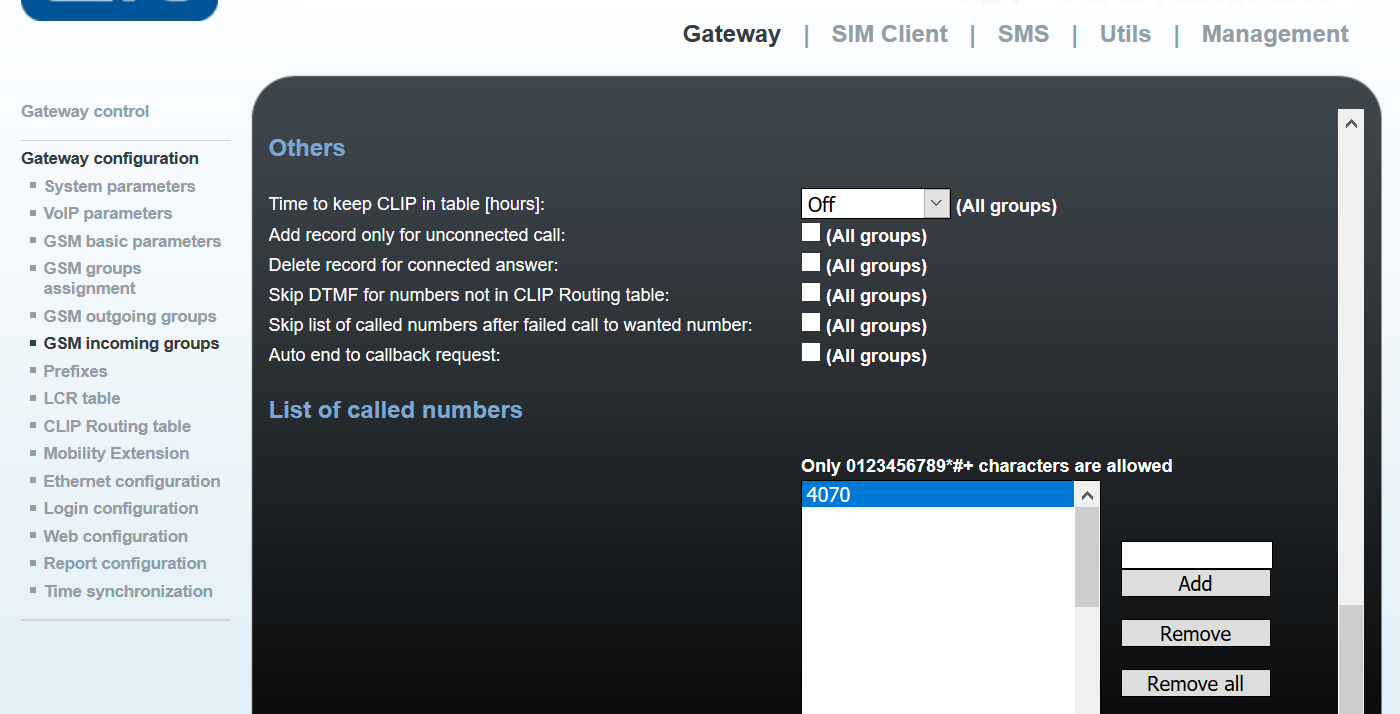
Ok, lets move onto GSM incoming groups. This is where we can configure some inbound functions. In my scenario, I need to direct all calls to the Reception Phone. Firstly, I need to drop down the ‘Mode’ box and select “Accept incoming call + dialtone”. The 2N GSM Gateway by default will reject all calls from the GSM network.
Next, I modify the DTMF dialling timeout field. Default is 10 seconds.. I change tis to 0 seconds. This will not wait for any dtmf digits to be pressed and forward the call onto the List of Called Numbers. (below image). Now this takes us to the List of Called Numbers, essentially all inbound calls in this group will call in a sequential order any number in the list. Just make sure this number exists in CUCM.
Now of course, I always recommend changing the default password.. I’ll let you figure that one out.
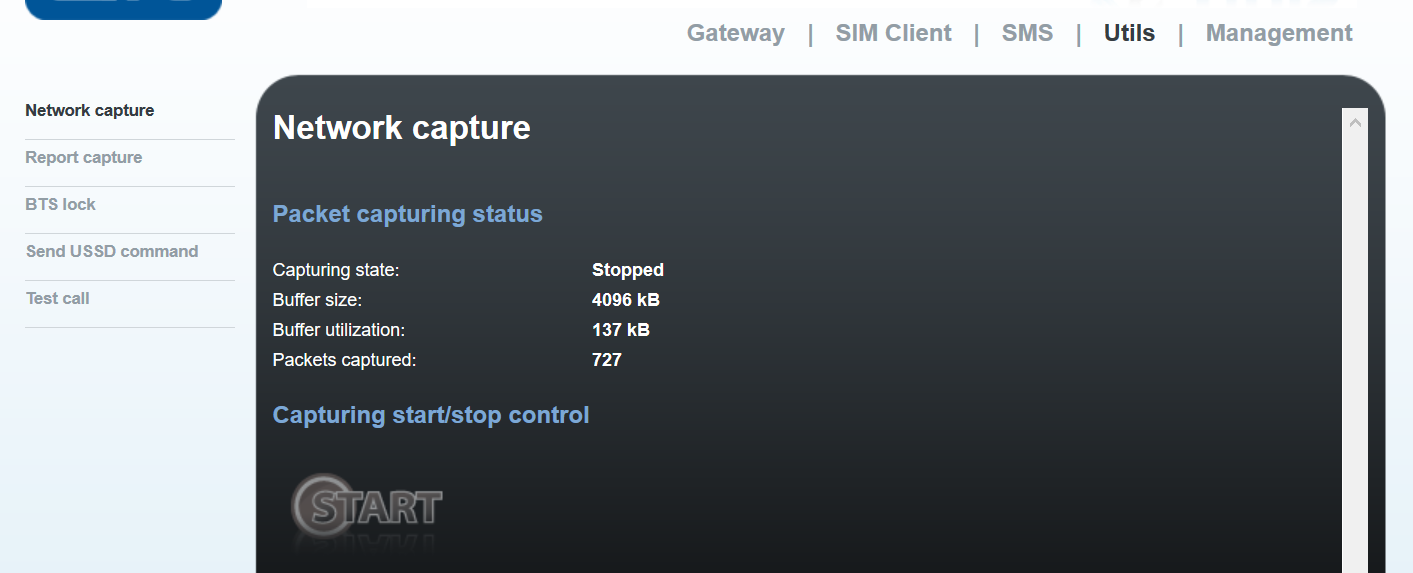
That’s it for the GSM Gateway side of the story.. I leave with a couple if useful features on the GSM Gateway.. Its packet capturing and making test calls both toward the GSM and CUCM. Self explanatory so if you get stuck, these two tool will definitely come in handy.
Now onto the Cisco CUCM Side.
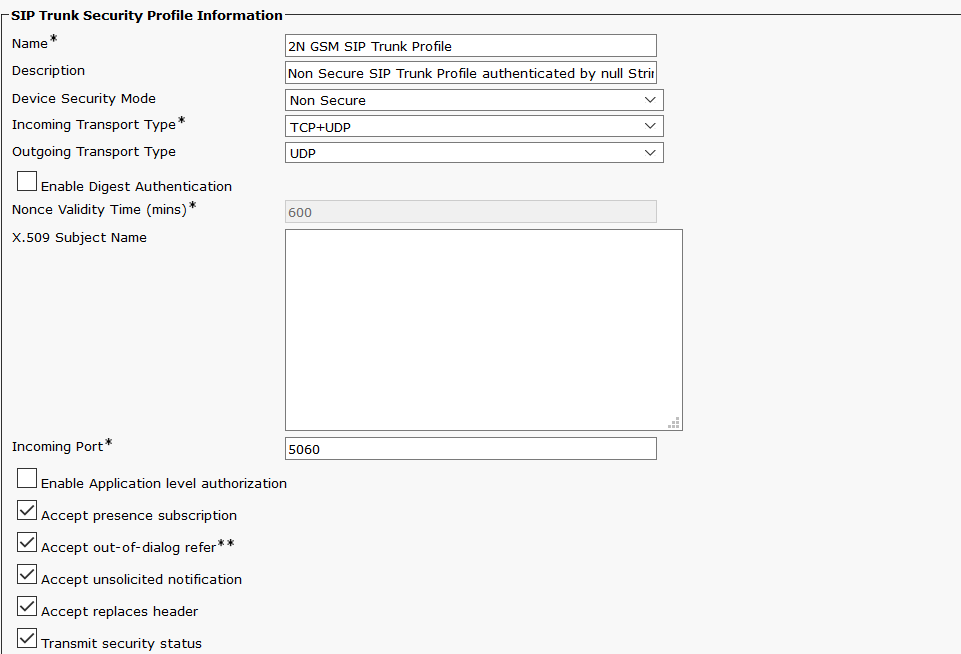
Start by creating a new SIP Trunk Security Profile. You can just copy the standard non secure security profile. Ensure the Outgoing Protocol is UDP. Also see below for the checkbox enablement.
Next, lets create a SIP Trunk. Nothing fancy here. Just make sure you have the required fields configured along the below fields.
- Calling Search Space
- Destination Address
- Sip Profile
- SIP Trunk Security Profile
Create a Route Group and add the new created SIP Trunk. You can also edit an existing Route Group if you wish.
We then need to create a Route List, we add the Route Group we create in the previous step the this Route List. Forget this step if you have simply added the SIP Trunk to an existing Route Group.
Create a route pattern and select the Route List above.
Remember to Reset the Trunk!
Now make some test calls..
